How to Package a Next.js App as a CLI Command
Introduction
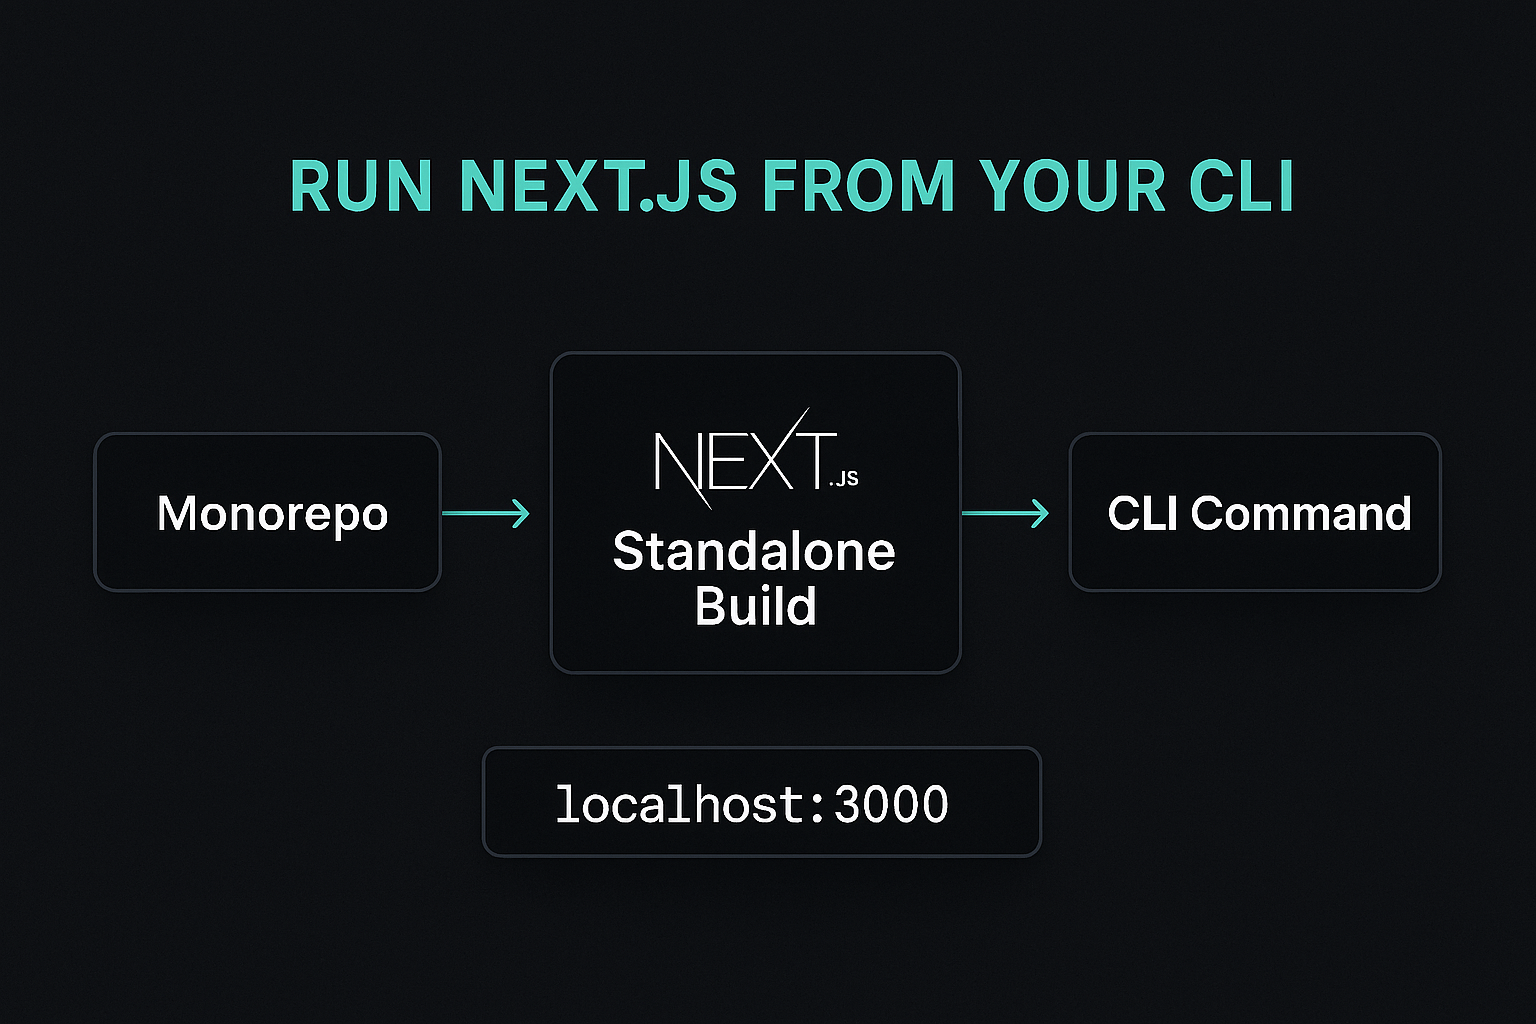
Have you ever wanted to distribute a Next.js application as part of a CLI tool? Maybe you're building a monorepo with multiple packages, and one of them needs to serve a web interface on demand. This was exactly the challenge I faced recently, and after some trial and error, I found a clean solution.
In this post, I'll walk you through the complete process of packaging a Next.js app as an npm package that can be programmatically started by a CLI command.
The Use Case
Picture this: you're building a developer tool like drizzle studio or mastra dev where users install your CLI package and can run commands like:
your-tool dev
# or
your-tool dashboard
This command should spin up a web interface where users can manage configurations, view data, or interact with your tool through a nice UI. Think of how Drizzle Kit launches a database browser, or how Mastra opens a development dashboard - that's exactly what I was trying to build.
The Challenge
I needed to create a CLI package in my monorepo that could spin up a Next.js application on demand. The tricky part was figuring out how to:
- Build the Next.js app in a way that could run independently
- Package only the necessary files for npm distribution
- Programmatically start the server from another package
Step 1: Creating a Standalone Build
The key to making this work is Next.js's standalone output mode. This feature creates a self-contained version of your app that includes only the necessary files and dependencies.
First, I updated the next.config.js file:
/** @type {import('next').NextConfig} */
const nextConfig = {
  output: 'standalone'
}

module.exports = nextConfig
This tells Next.js to create a standalone build that can run independently without the original node_modules directory. You can read more about this feature in the Next.js documentation on standalone output.
Step 2: Copying Required Assets
The standalone build doesn't automatically include static assets, so I needed to copy them manually. I added these scripts to my package.json:
{
  "scripts": {
    "build:sync": "cp -r public .next/standalone/my-app && mkdir -p .next/standalone/my-app/.next/ && cp -r .next/static .next/standalone/my-app/.next/static",
    "build": "next build && pnpm build:sync"
  }
}
Important note: Replace my-app with your actual directory name. Next.js creates the standalone build in a directory that matches your project's folder name.
Here's what these commands do:
- Copy the
publicdirectory to the standalone build - Create the
.nextdirectory structure within the standalone build (Next.js expects this directory structure to exist at runtime) - Copy the static assets that Next.js generates
Step 3: Configuring the Package for npm
To publish only the standalone build (not the entire Next.js project), I configured the package.json with specific export settings:
{
  "main": ".next/standalone/server.js",
  "exports": {
    ".": "./.next/standalone/server.js",
    "./package.json": "./package.json"
  },
  "files": [
    ".next/standalone"
  ],
  "publishConfig": {
    "access": "public",
    "registry": "https://registry.npmjs.org/"
  }
}
This configuration:
- Sets the main entry point to the generated
server.js - Defines explicit exports for the package
- Ensures only the
.next/standalonedirectory is included in the published package - Configures npm publishing settings
Step 4: Running the App Programmatically
Now comes the interesting part - starting the Next.js server from another package in the monorepo. I created a function to resolve the path to the published package:
import { createRequire } from 'node:module';
import { dirname, join } from 'node:path';

const require = createRequire(import.meta.url);

function resolveWebRuntime() {
  try {
    // Resolve the path to the installed package
    const pkg = require.resolve('your-package-name/package.json');
    const root = dirname(pkg);
    return join(root, '.next/standalone/my-app');
  } catch (err) {
    throw new Error(`Could not find package. ${err}`);
  }
}
Finally, I used Node.js's fork method to spawn the server process:
import { fork } from 'node:child_process';

function startServer() {
  const rootPath = resolveWebRuntime();
  const entry = join(rootPath, 'server.js');
  const port = 3000;
  const host = 'localhost';

  const child = fork(entry, [], {
    cwd: rootPath,
    env: {
      ...process.env,
      NODE_ENV: 'production',
      PORT: String(port),
      HOSTNAME: host,
    },
    stdio: 'inherit',
  });

  // Handle graceful shutdown
  process.on('SIGINT', () => {
    console.log('🛑 Stopping server...');
    child.kill('SIGINT');
    process.exit(0);
  });

  process.on('SIGTERM', () => {
    child.kill('SIGTERM');
    process.exit(0);
  });

  return child;
}
Why This Approach Works
The standalone build created by Next.js includes:
- A
server.jsfile that can start an HTTP server - All the necessary application code and dependencies
- Optimized production builds of your pages and components
By packaging only this standalone directory and providing a programmatic way to start it, you get:
- Smaller package size: Only essential files are published
- Independence: The app can run without the original development setup
- Flexibility: Easy to integrate into CLI tools or other Node.js applications
Key Takeaways
- Use Next.js standalone output: This is crucial for creating a self-contained build
- Don't forget static assets: The build process doesn't automatically copy
publicand.next/staticdirectories - Configure package.json carefully: Proper exports and file inclusion ensure your package works correctly
- Handle process lifecycle: Implement graceful shutdown handling for production use
This pattern has worked great for building CLI tools that need web interfaces, allowing you to distribute interactive dashboards as part of command-line tools while keeping everything nicely packaged and manageable.
What's Next?
You could extend this approach by:
- Adding configuration options for port and host
- Implementing health checks
- Adding logging and monitoring
Have you tried packaging Next.js apps in unconventional ways? I'd love to hear about your experiences and any improvements to this approach!
More articles.
Setting up HSQLDB on my Mac turned out to be more challenging than I anticipated. After spending hours troubleshooting, I decided to document the entire process. I'll be sharing a step-by-step guide to help you install and configure HSQLDB on macOS smoothly and efficiently